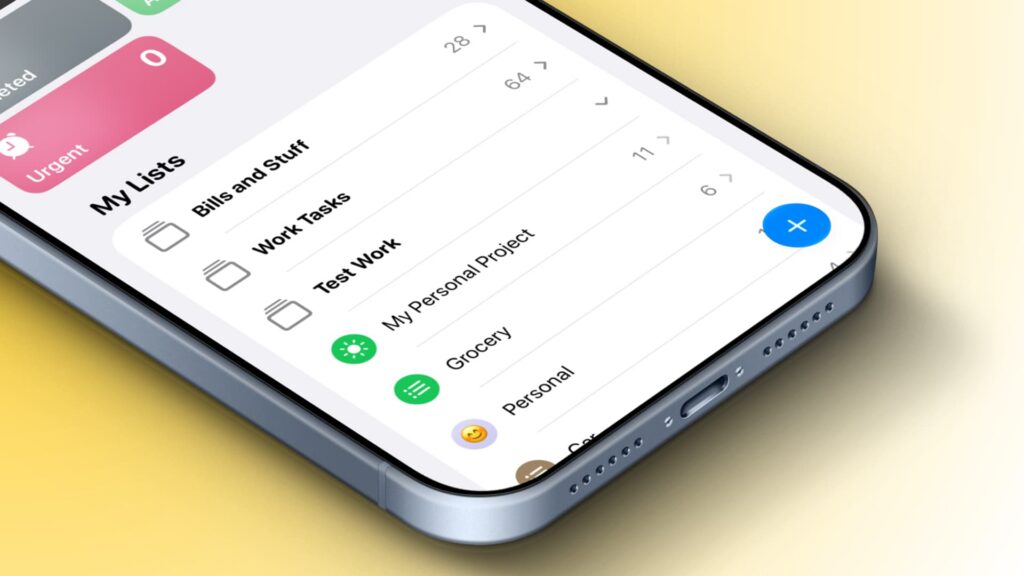
Apple Reminders lets you put multiple lists into a group, so you can see their tasks together without switching between lists. This guide reflects instructions reported on November 11, 2026.
You can create a group on iPhone, iPad or Mac by dragging one list onto another, then naming the group. This method moves one list at a time. If you want to include several lists while creating a group on iPhone or iPad, use the steps below.
Create a group on iPhone or iPad
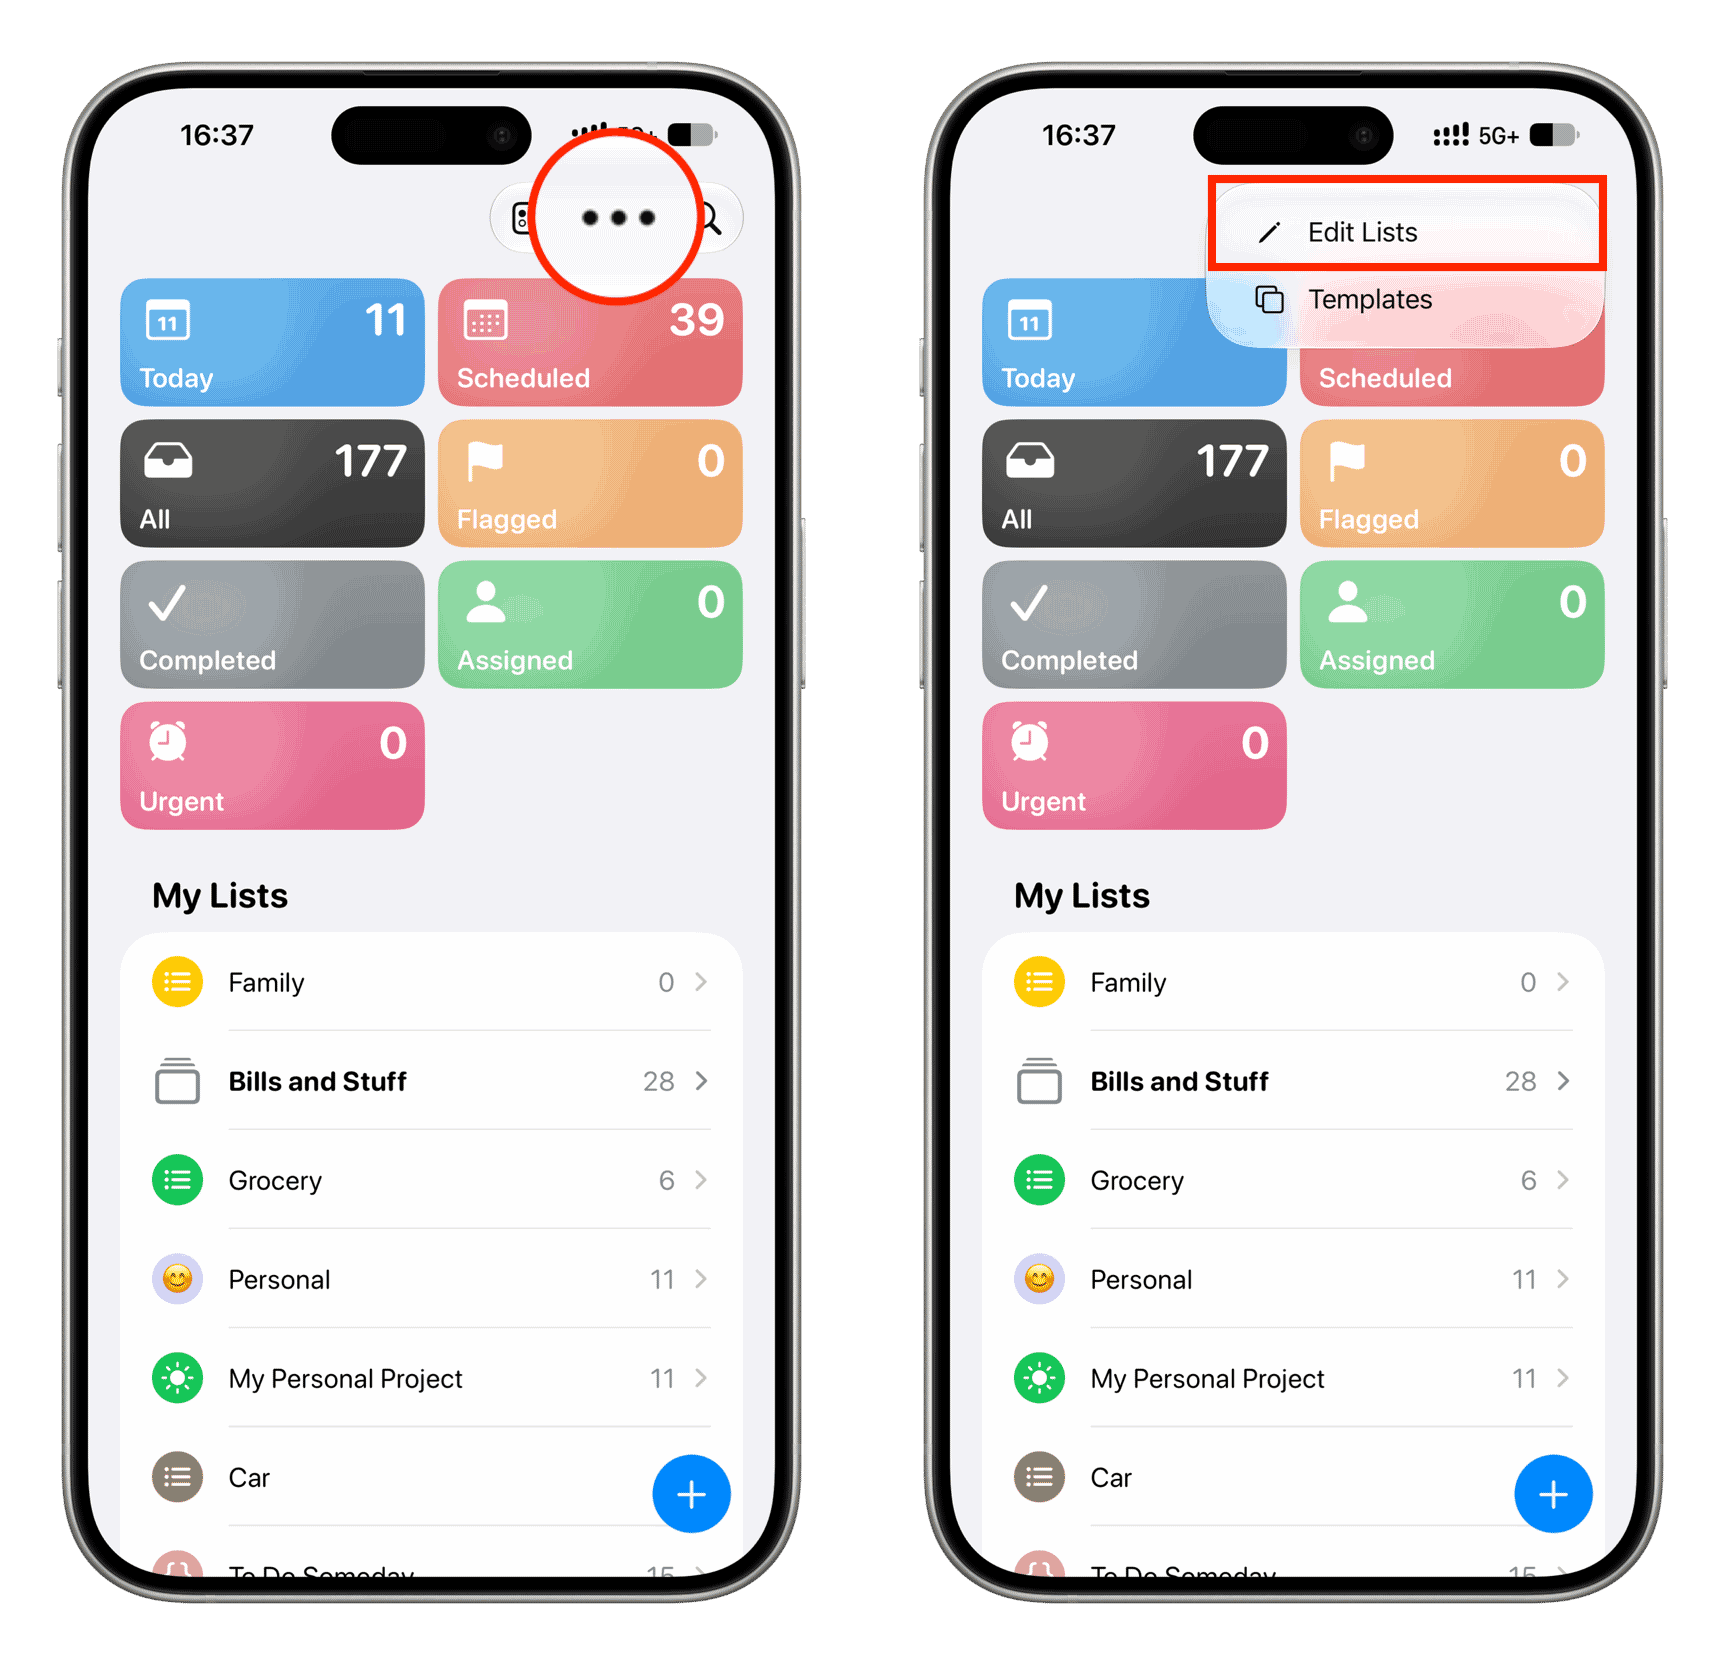
- Open Reminders, tap the three-dot button at the top, and select Edit Lists.
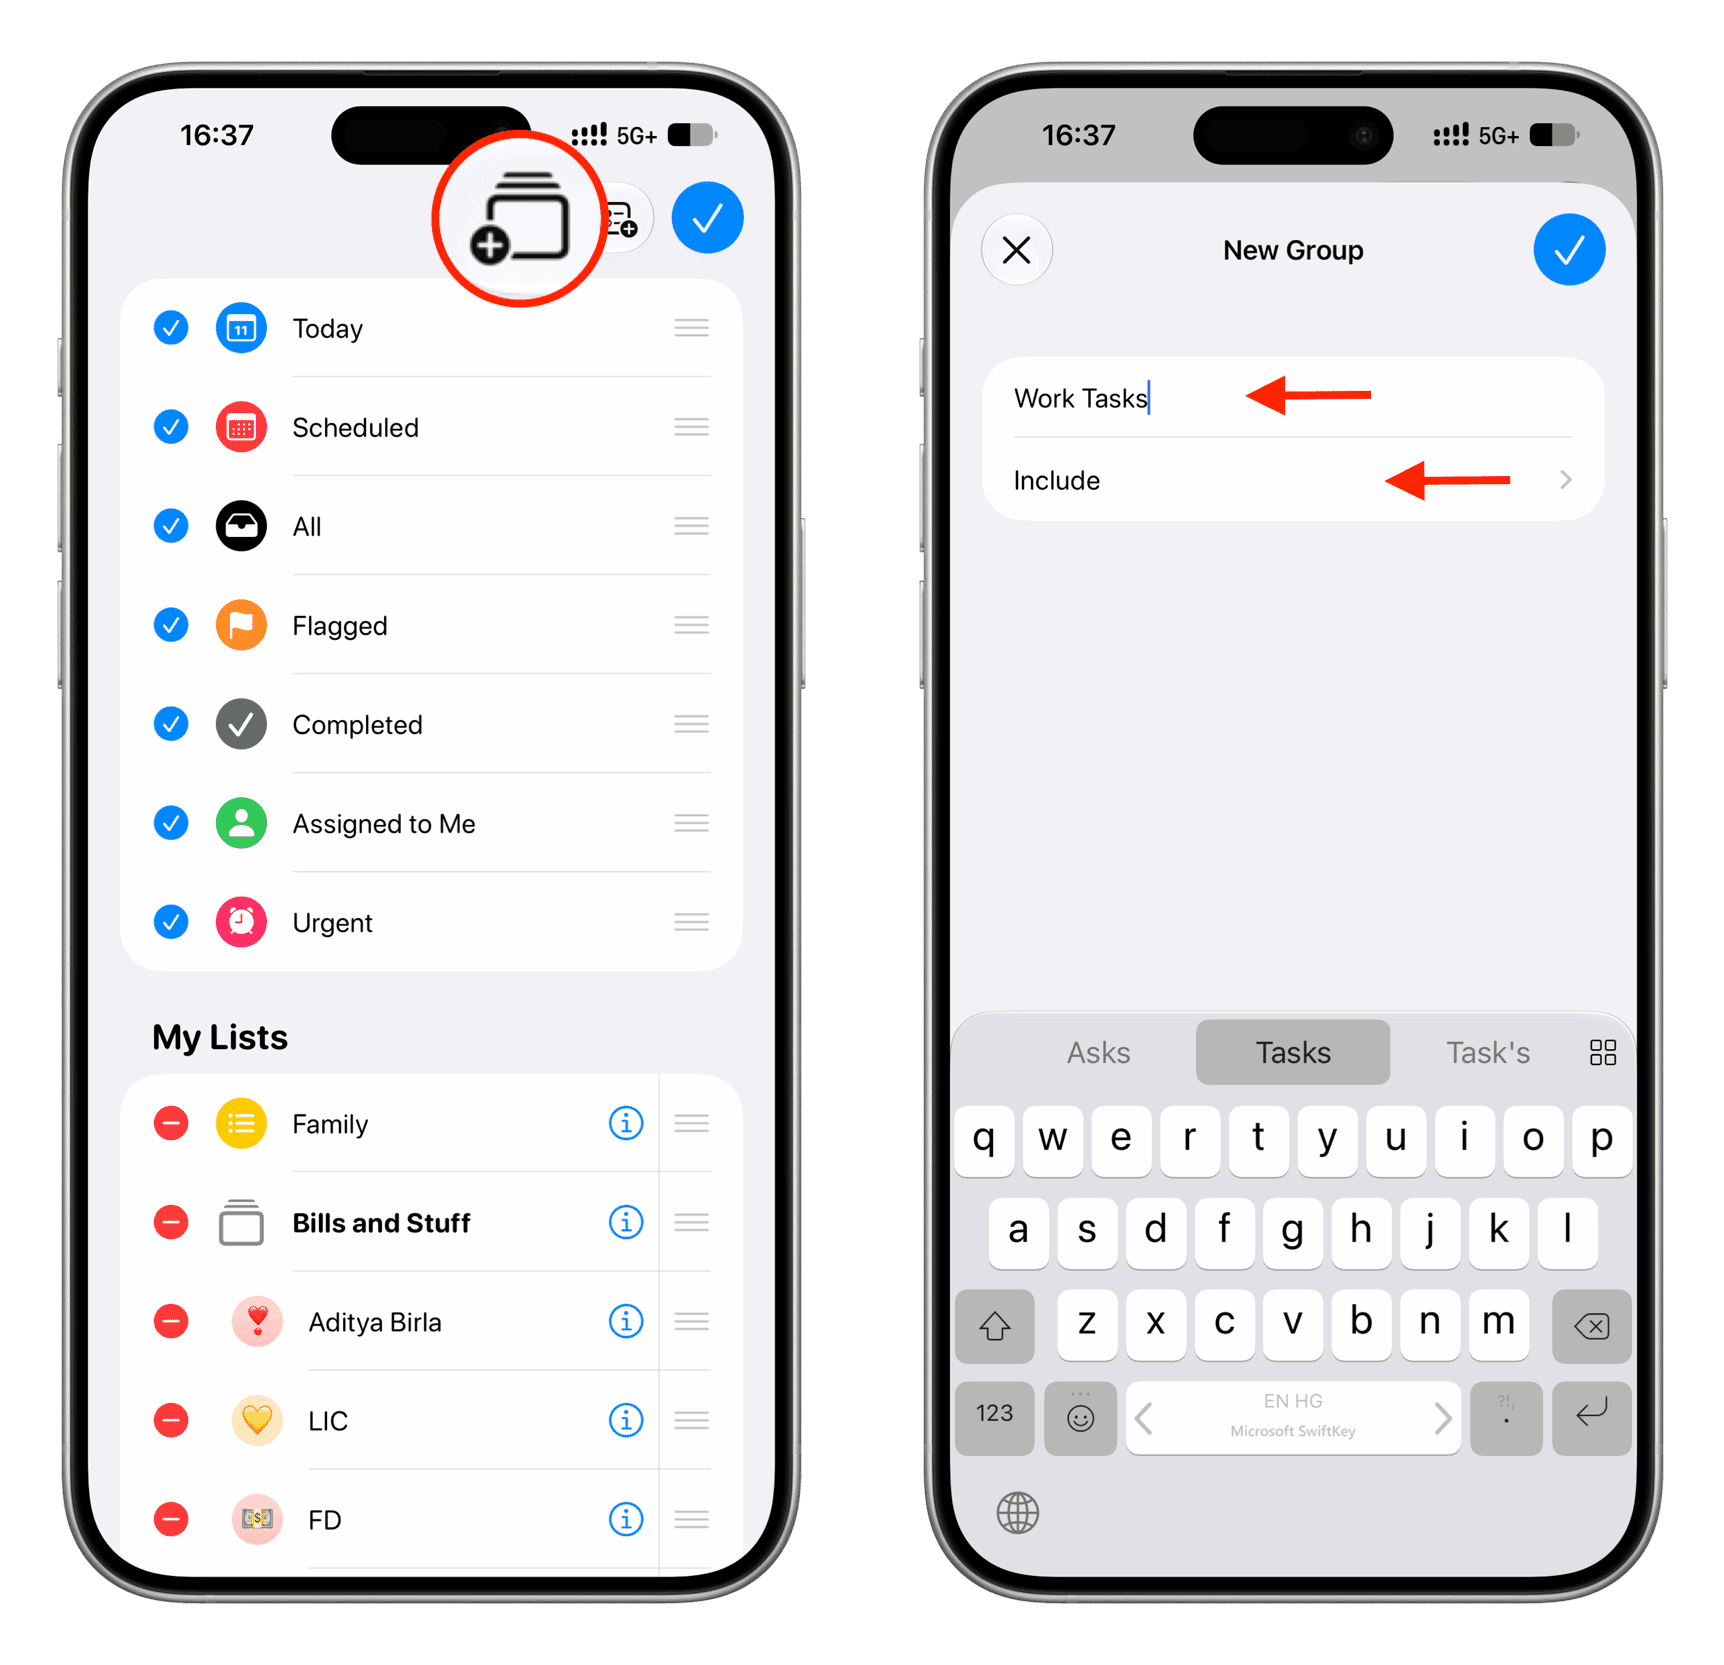
- Tap the new-folder button and name the group.
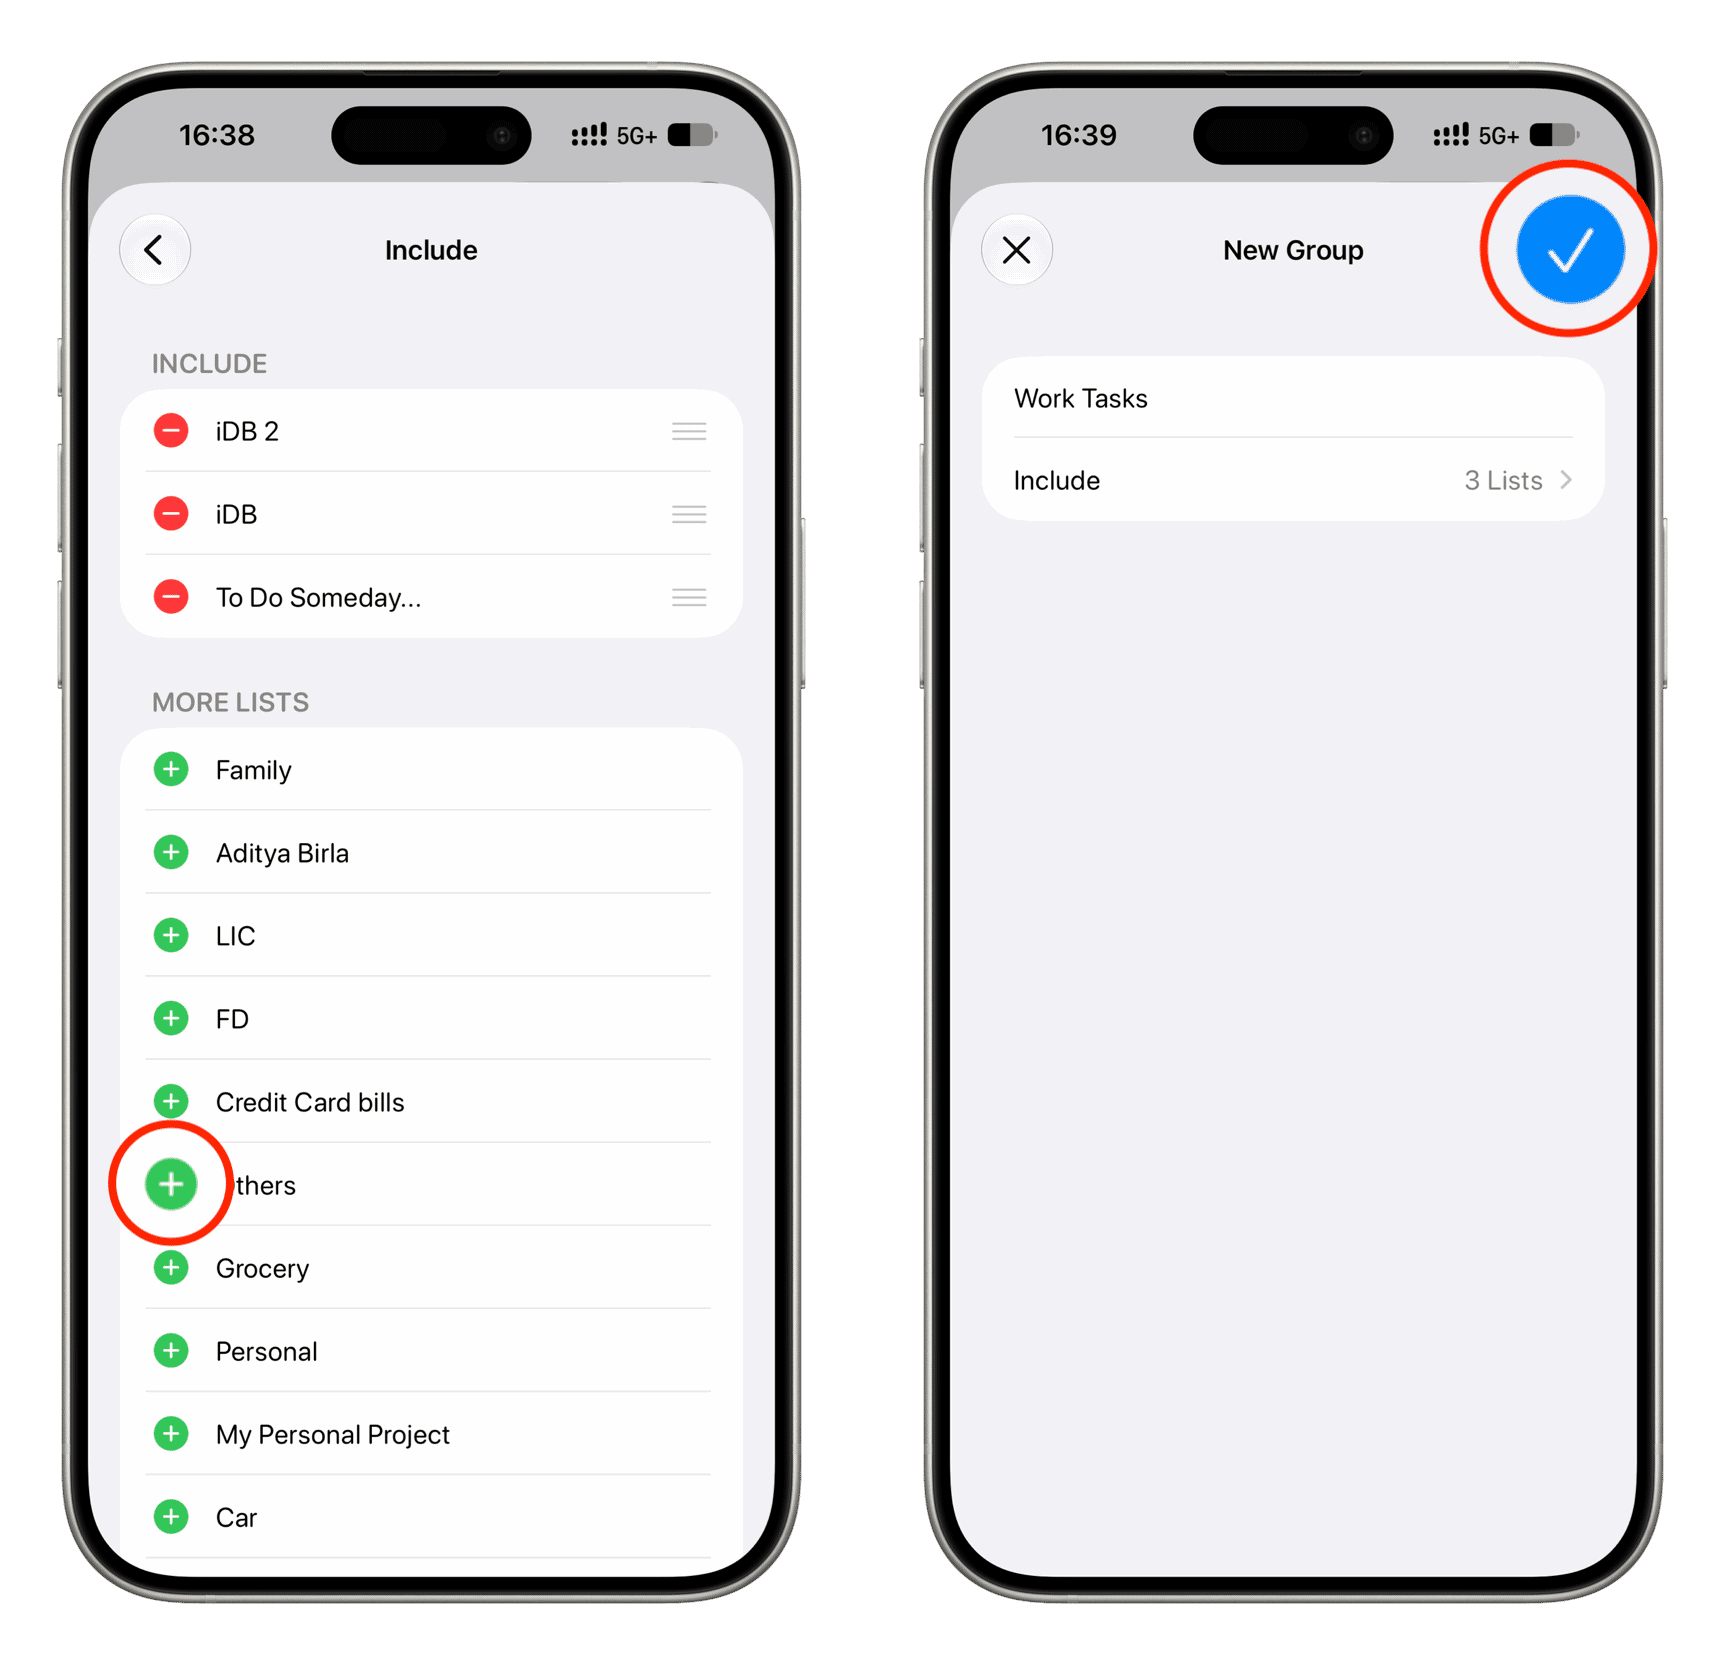
- Tap Include, then tap the green plus button beside each list you want to add.
- Tap Back, then tap the checkmark on that screen and again on the next screen to finish.
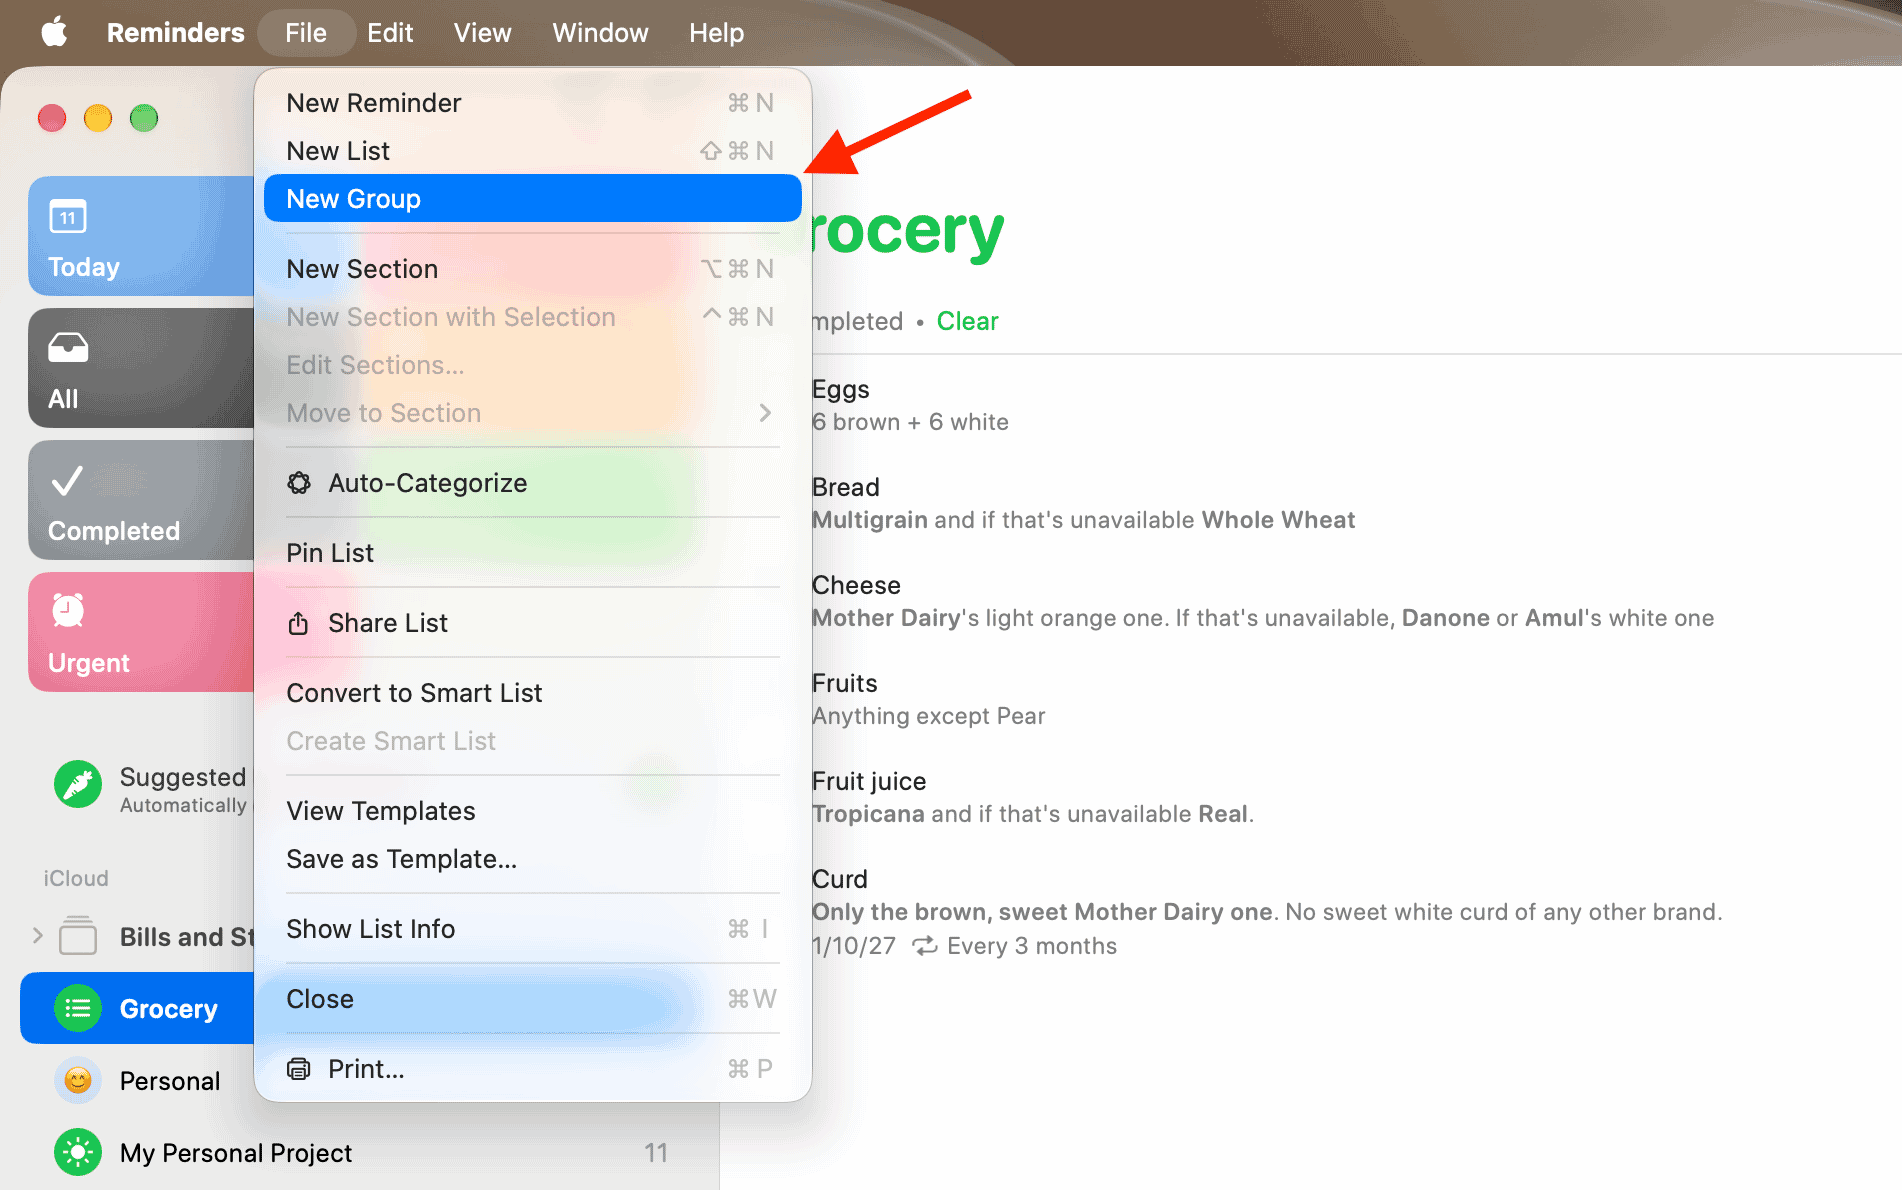
Create a group on Mac
- In Reminders, select a list.
- Choose File → New Group from the menu bar.
- Name the group and press Return.
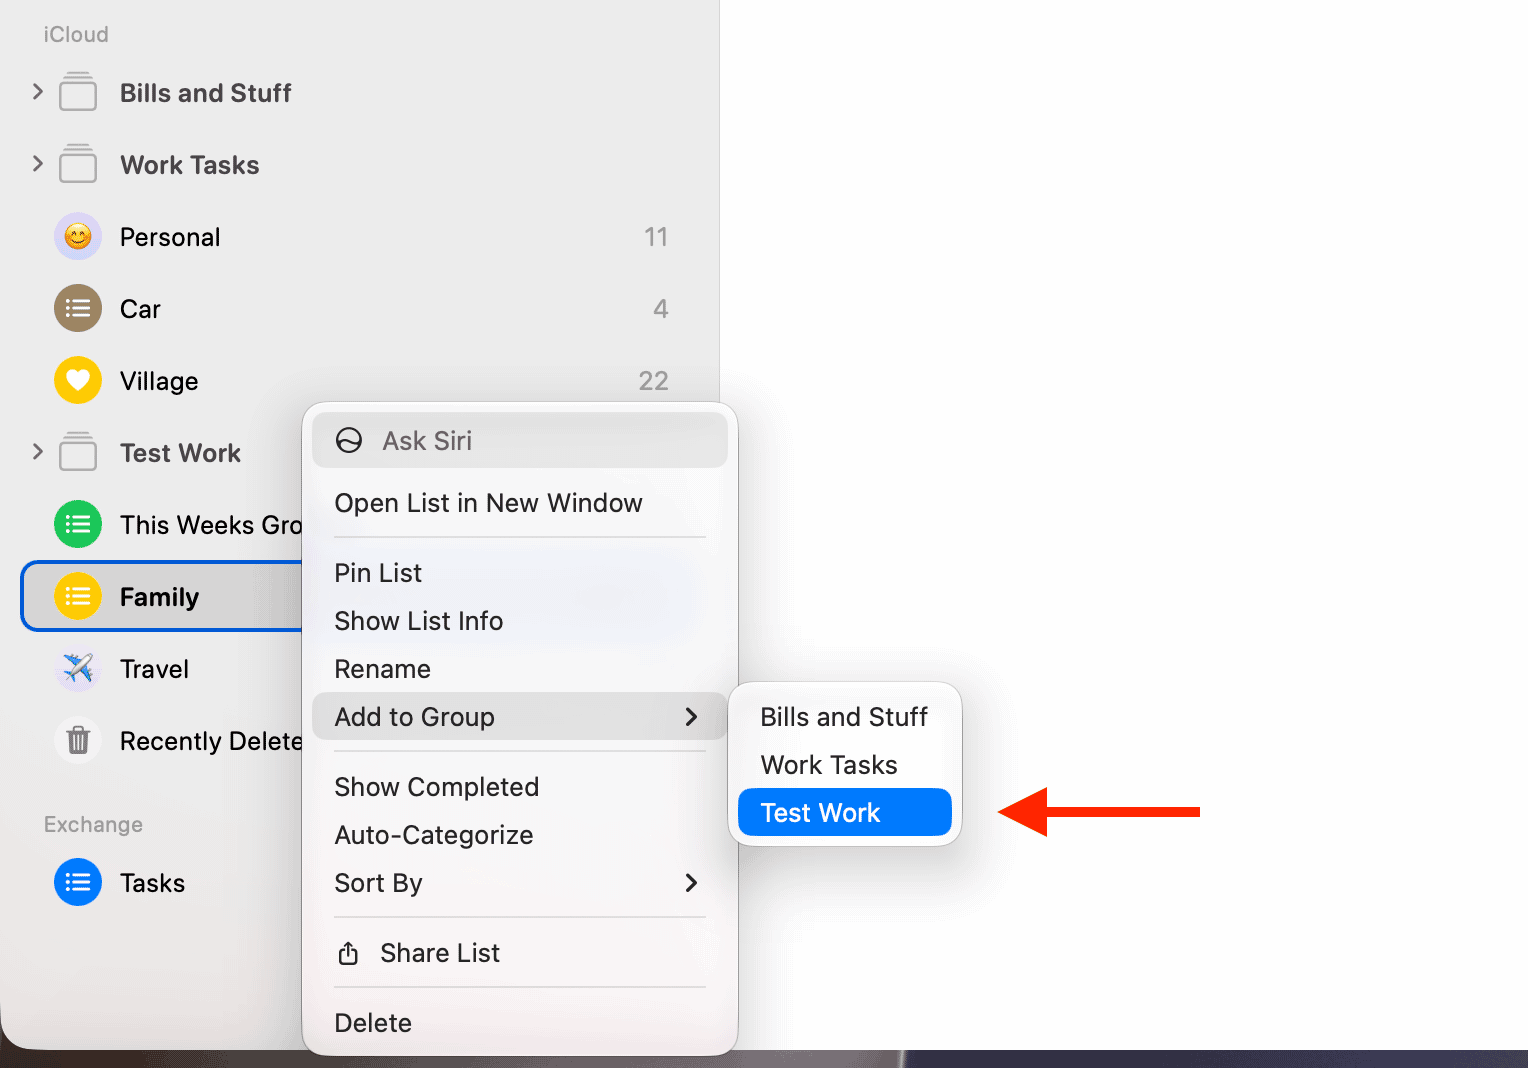
- Control-click or right-click other lists to add them to the group.
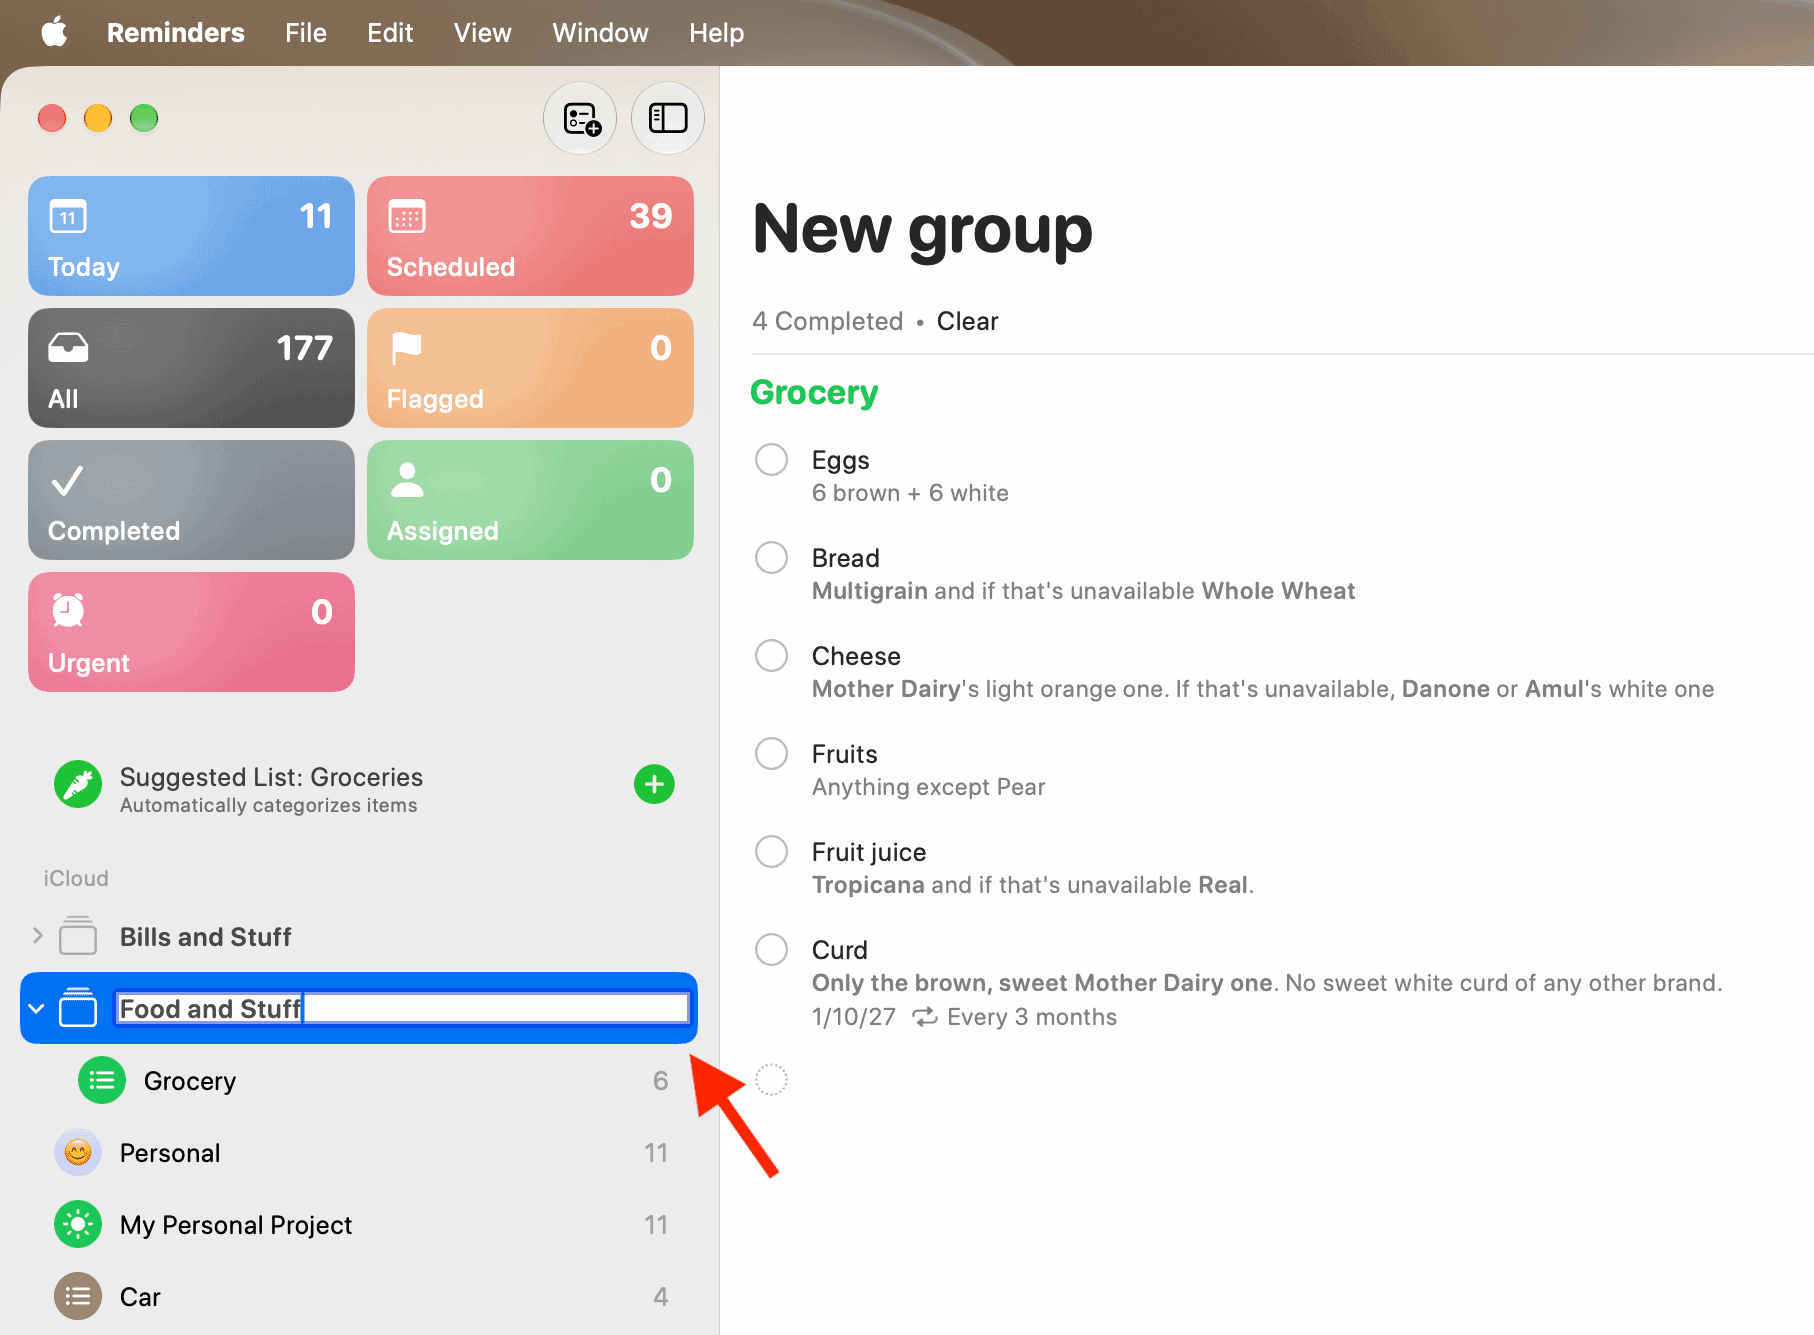
The Mac app does not offer the same way to select several lists at once while creating a group.
Use and manage a group
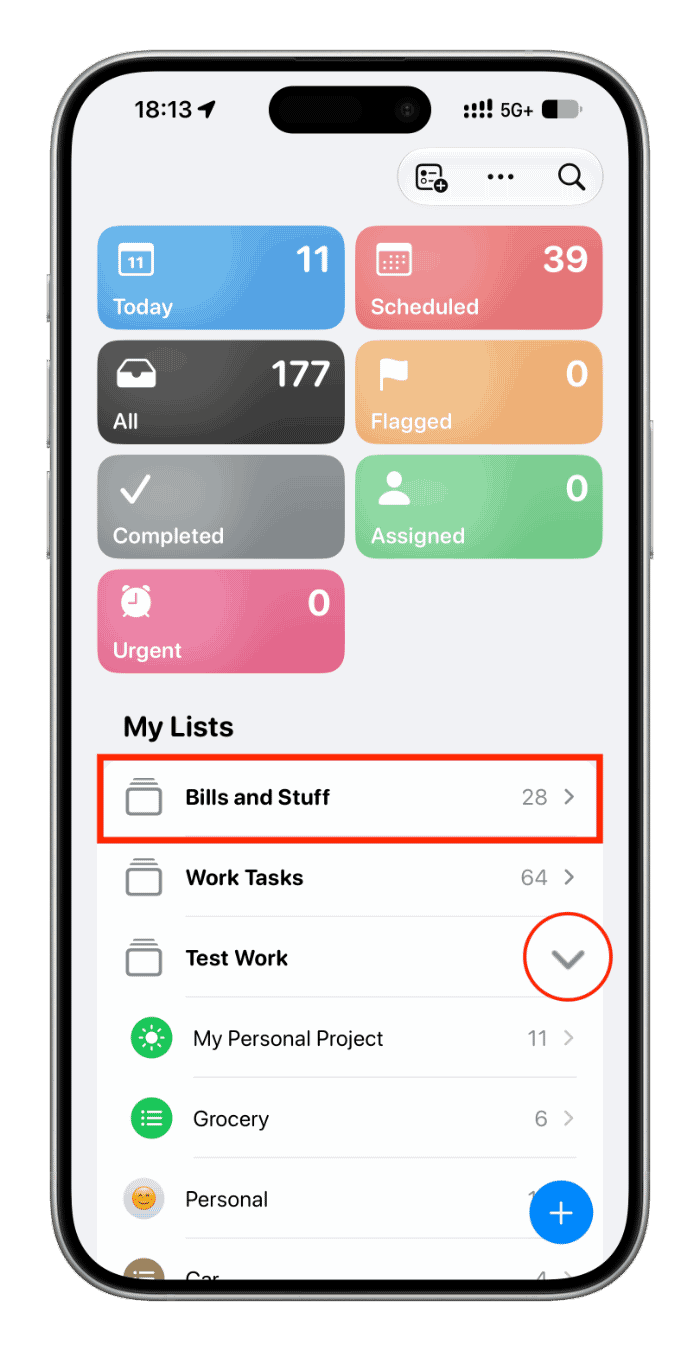
Select a group to see tasks from all its lists in one scrollable view. Select its arrow to reveal the individual lists, then open a list to see only its tasks. Groups sync through iCloud across devices signed in to the same Apple Account.
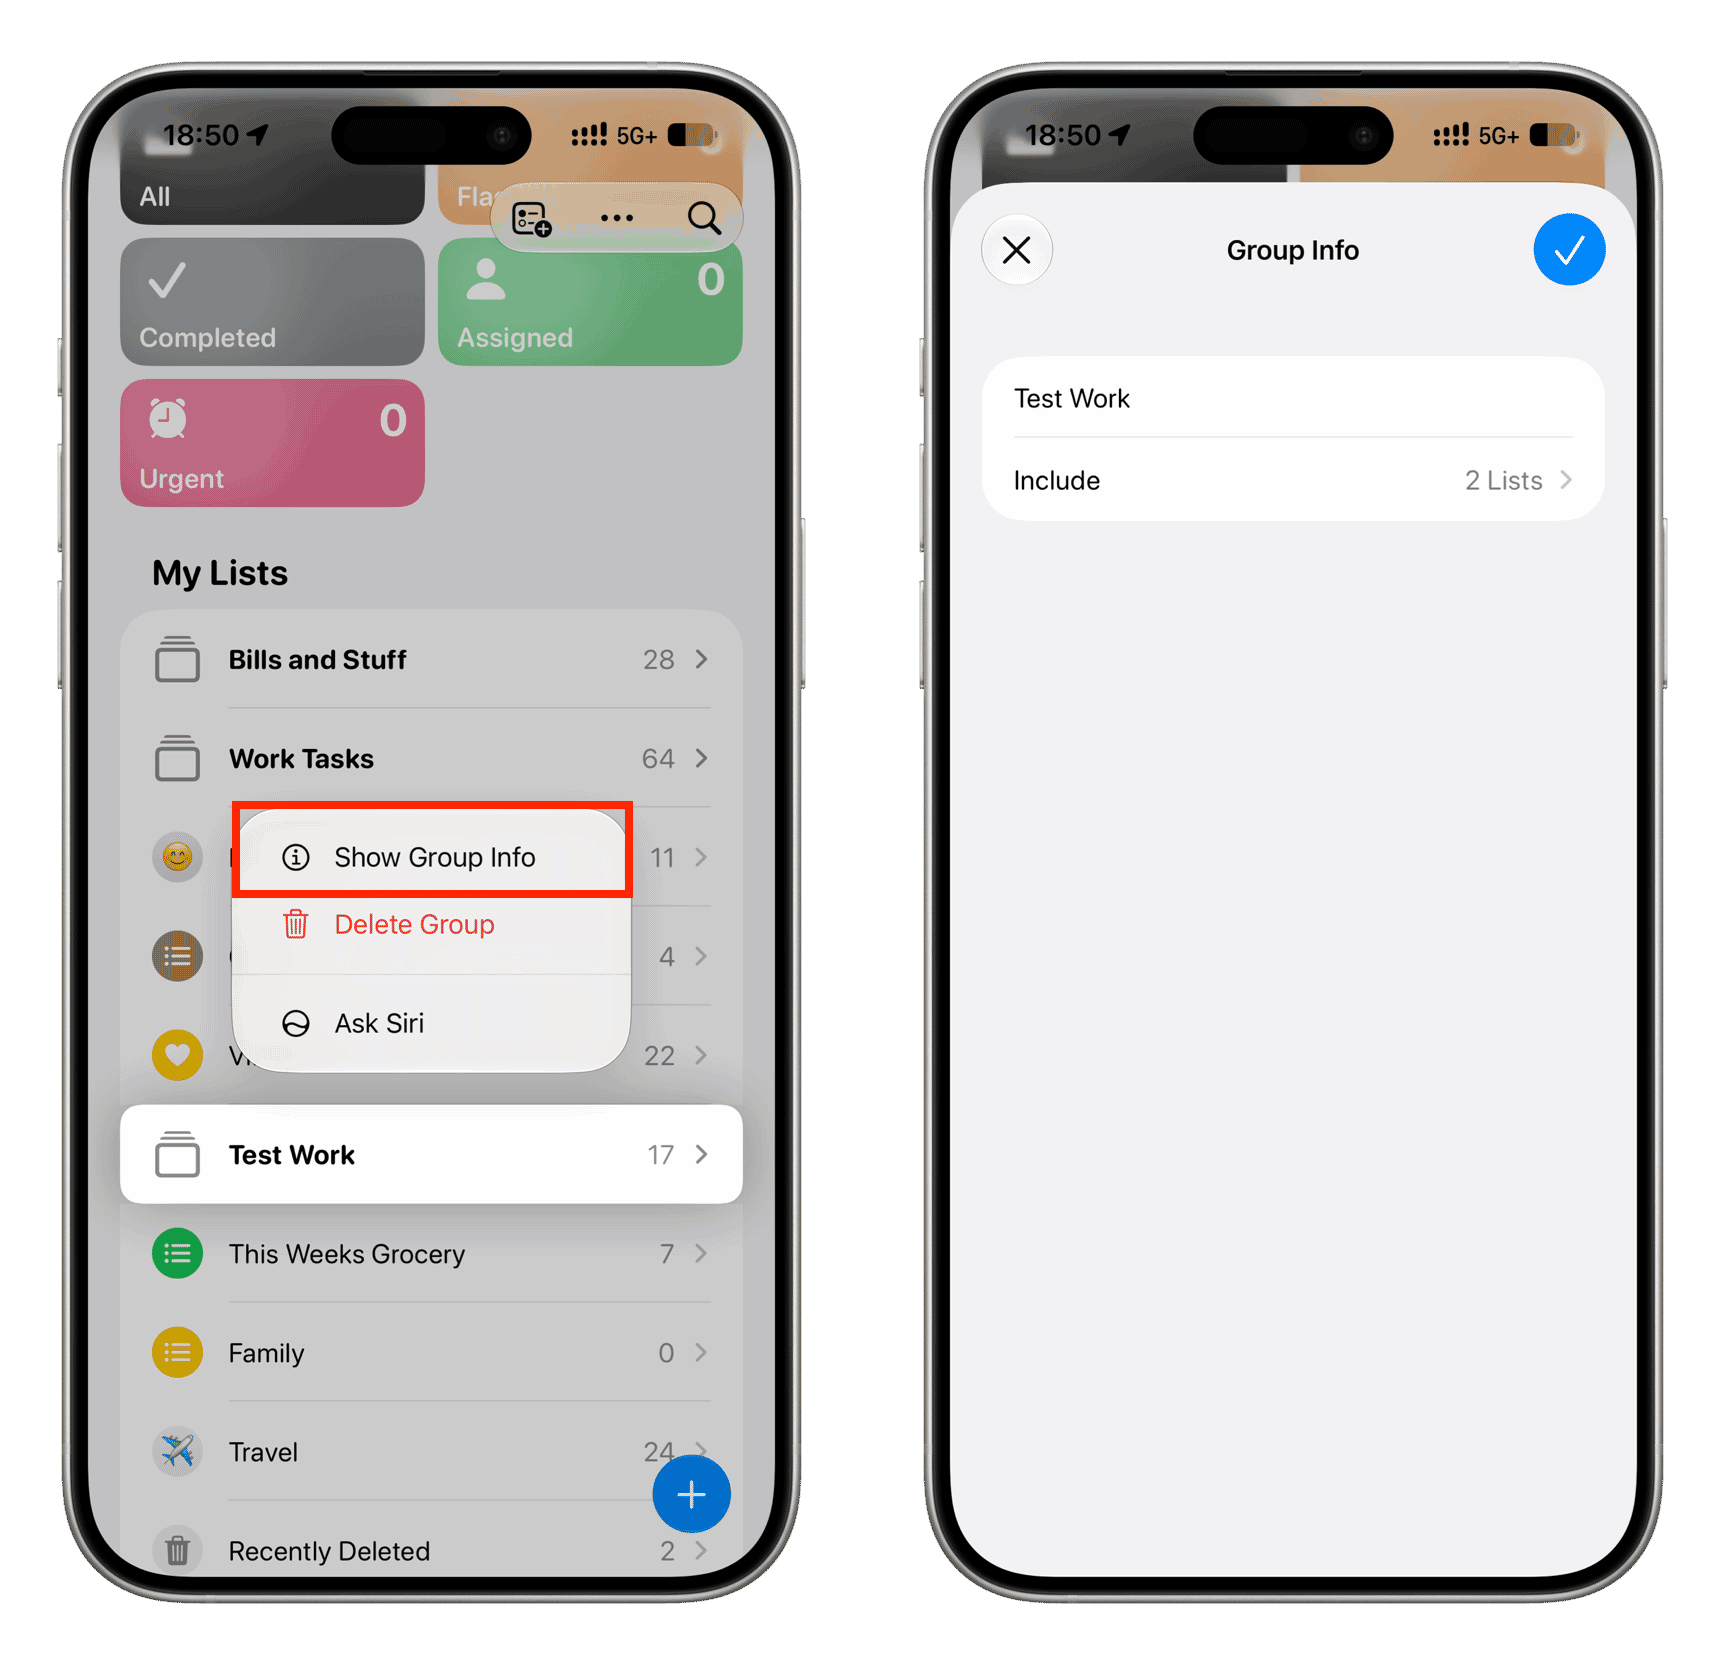
To change a group on iPhone or iPad, touch and hold it and select Show Group Info. You can rename it, tap Include to add lists with the green plus button or remove them with the red minus button, then go back and tap the checkmark to save. You can also drag lists into or out of a group; on Mac, right-clicking a list offers an option to add it to an existing group.
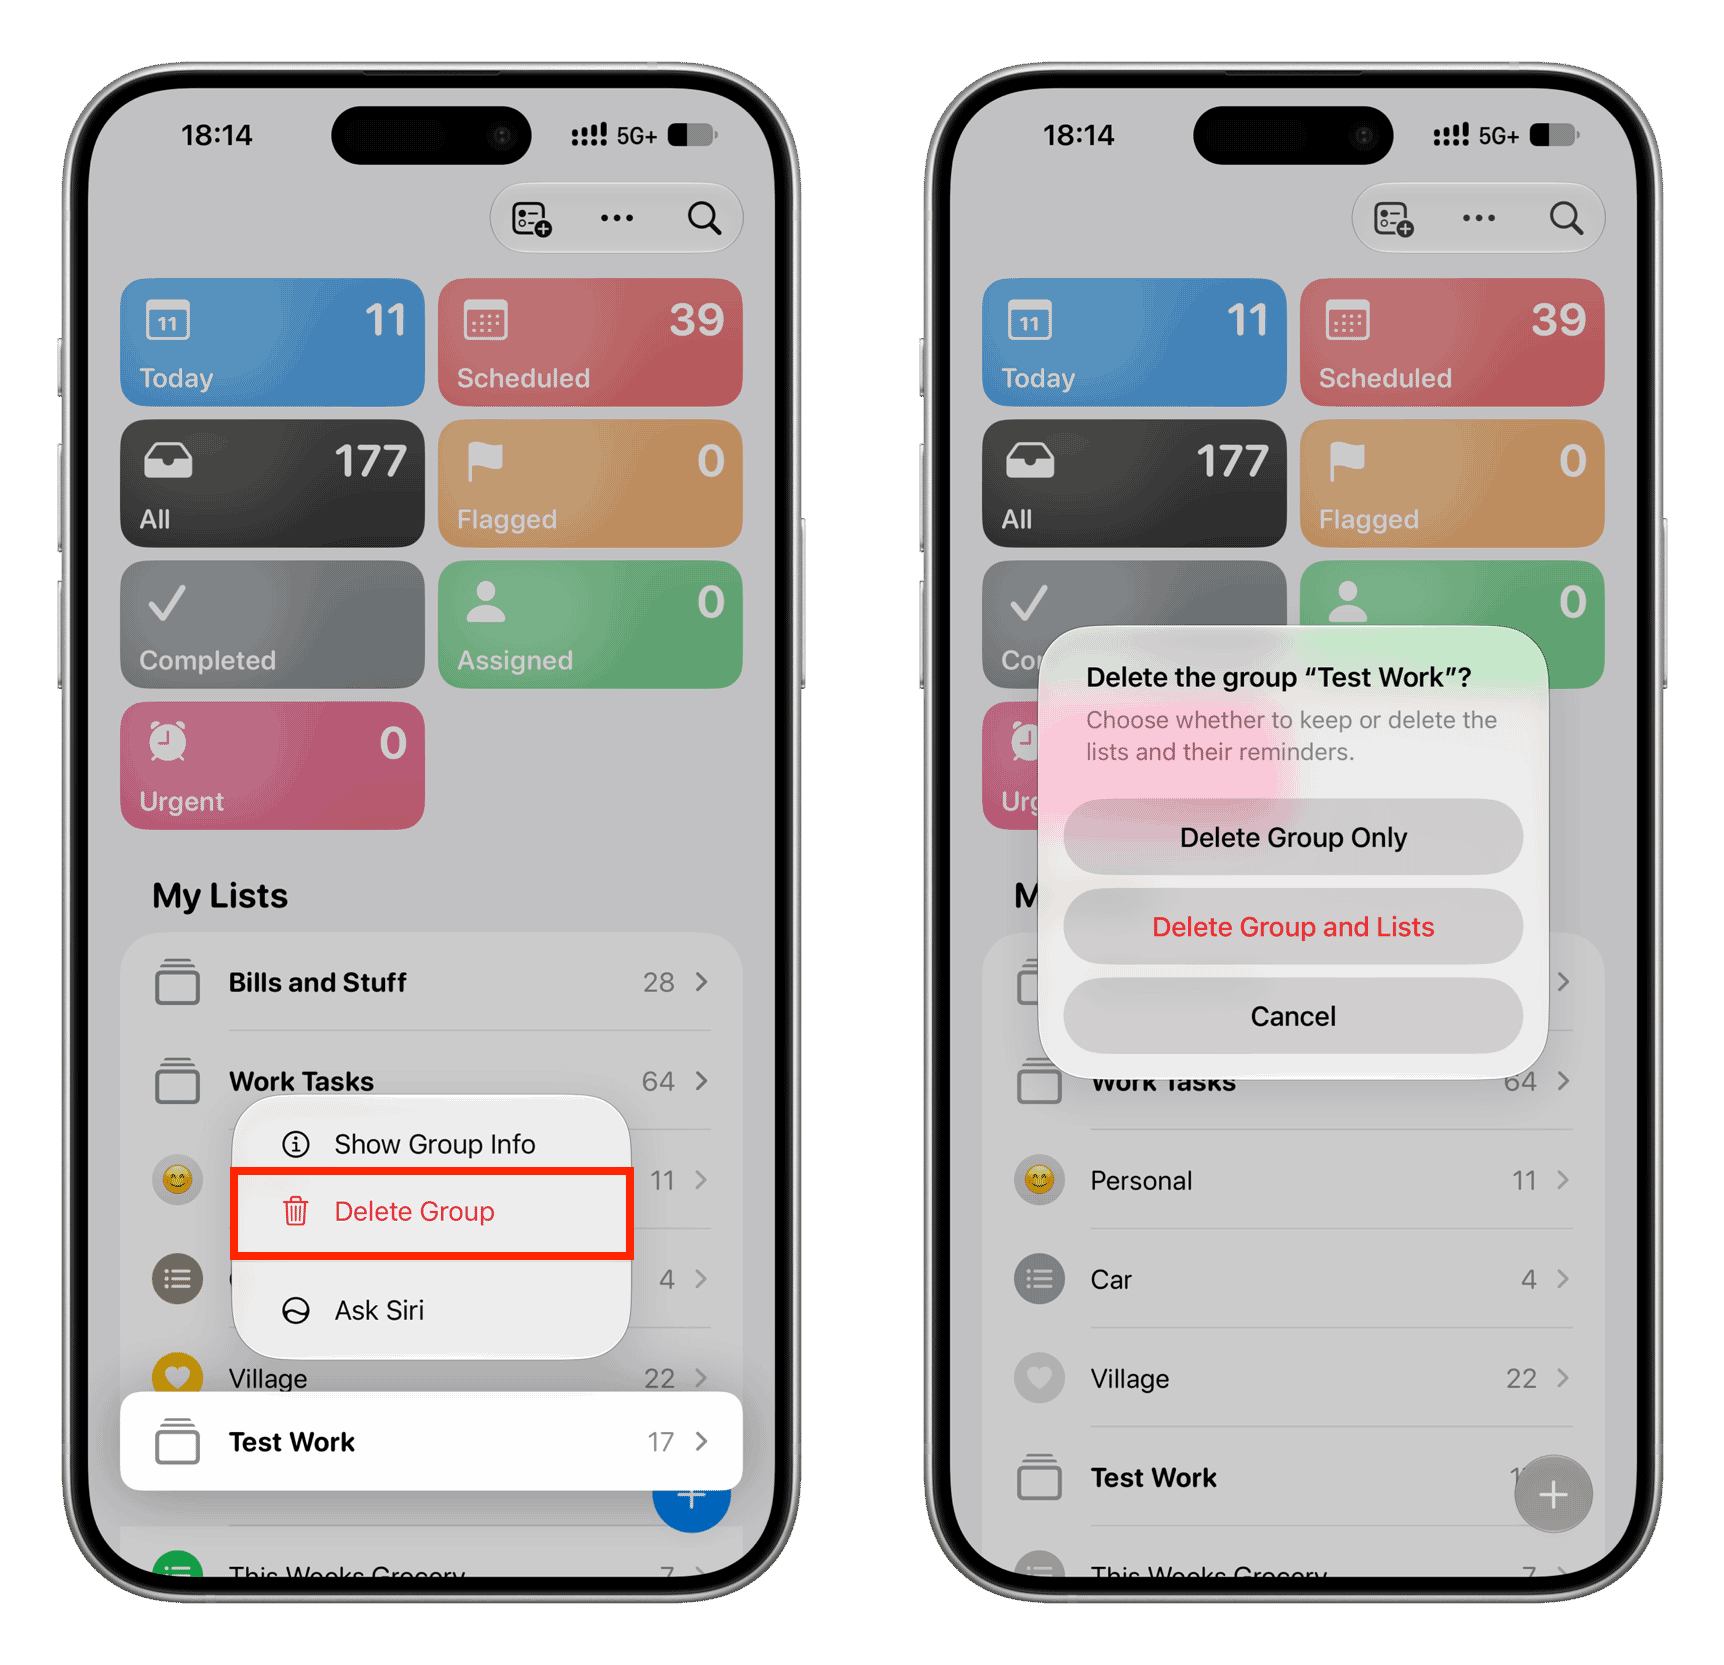
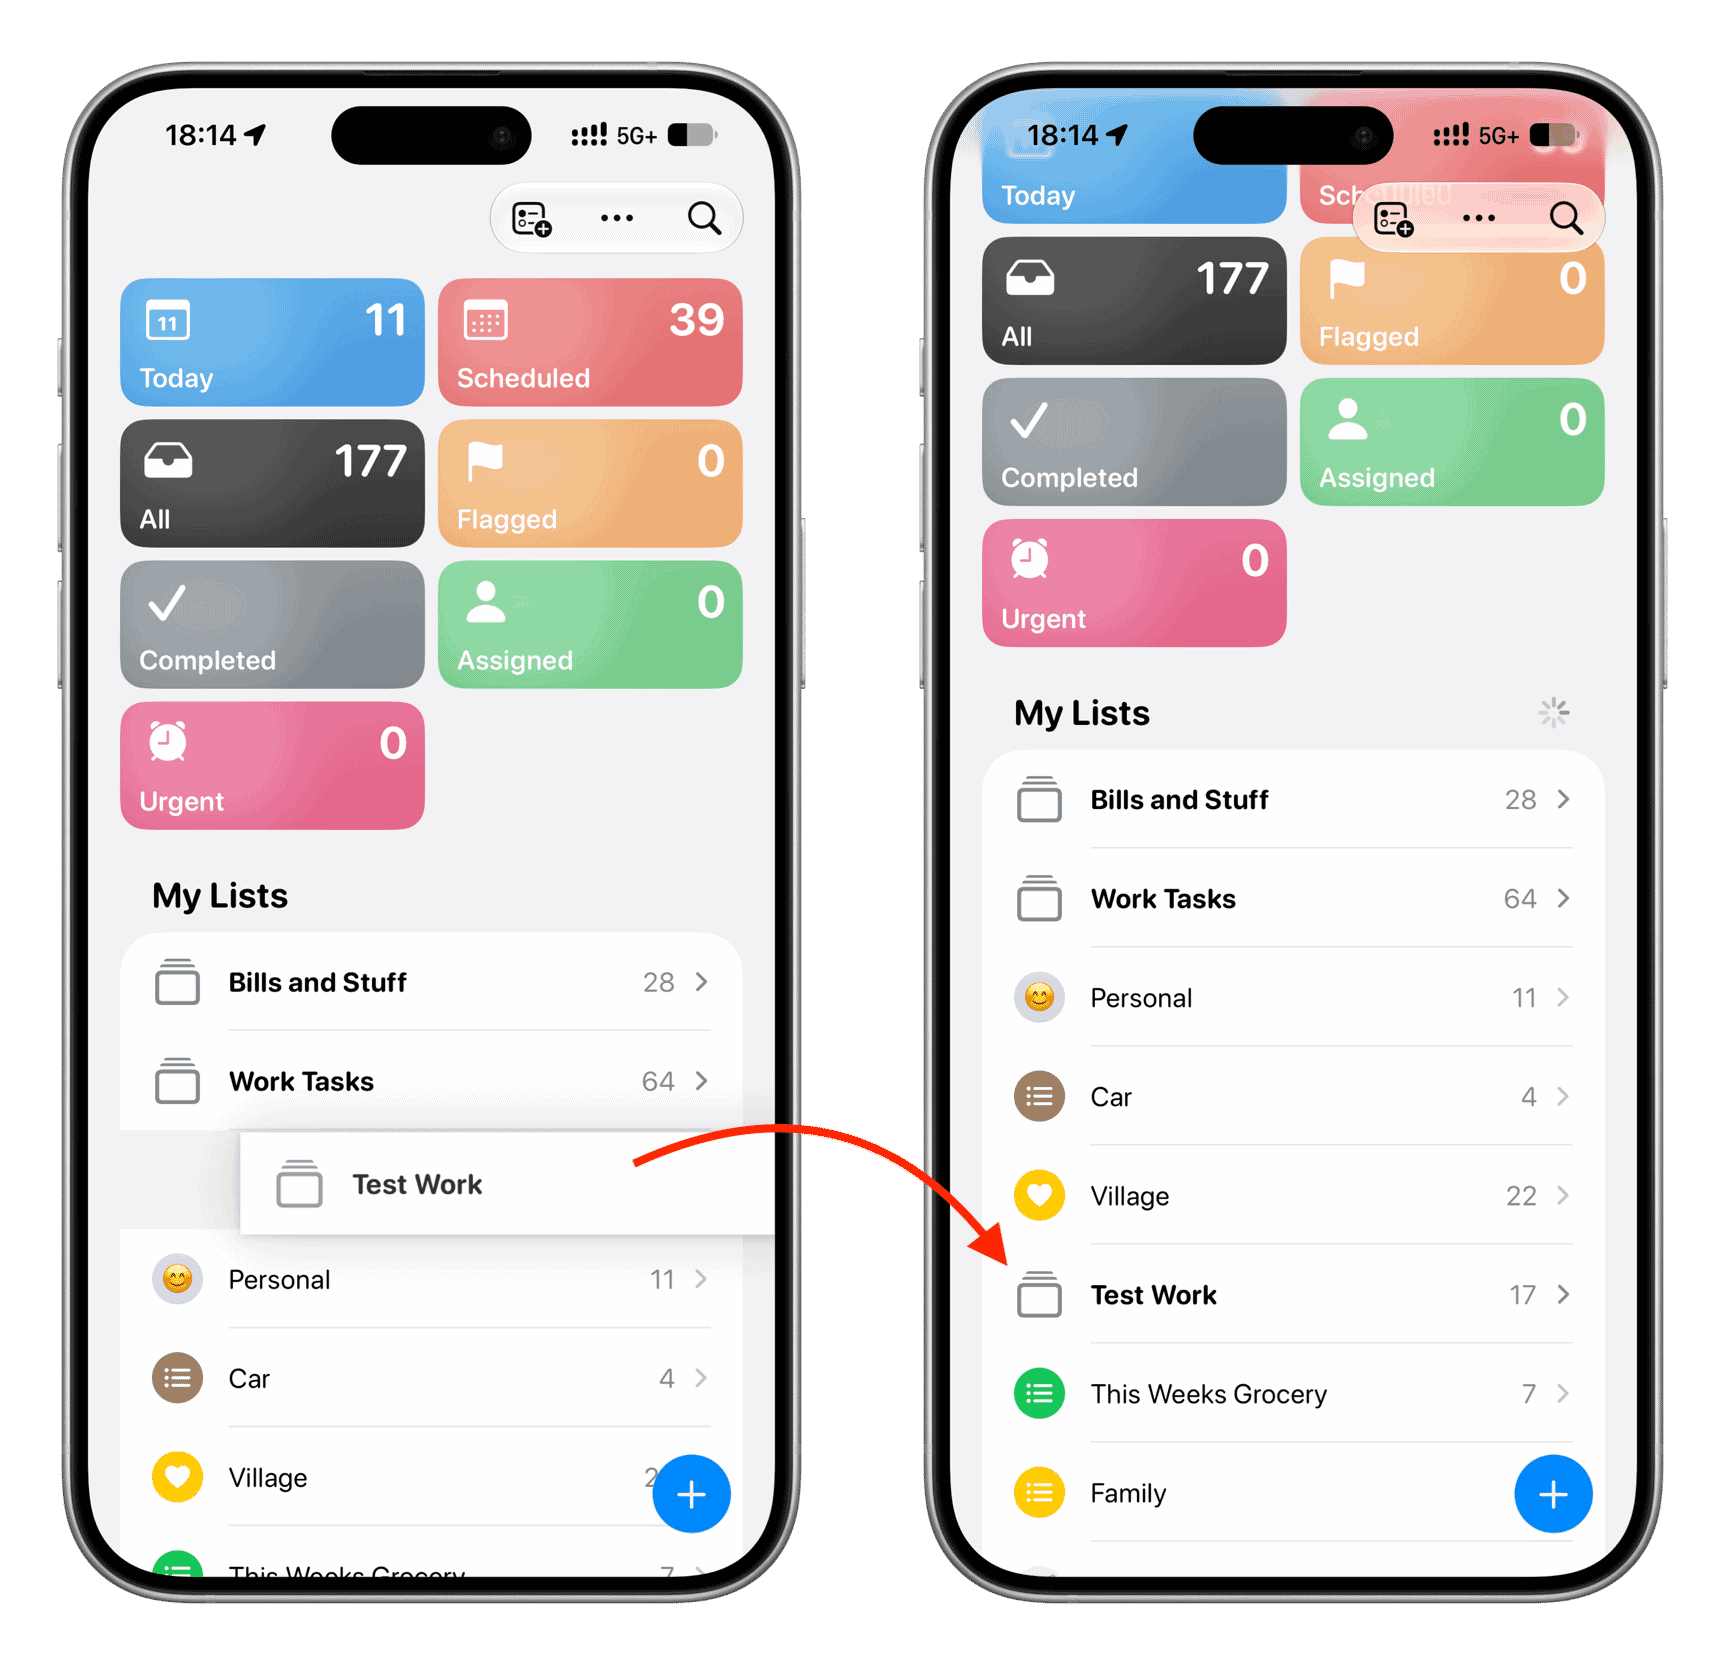
To change where a group appears, touch and hold it, then drag it to another position. To delete a group, touch and hold it on iPhone or iPad, or right-click it on Mac, and choose Delete. If it contains lists with tasks, Reminders offers a choice between deleting only the group while keeping its lists, or deleting the group and its lists.